There’s something about back-to-school season that still makes me want to get my life organized — even though I’m not packing lunchboxes or buying crayons. I think it’s the nostalgia. I remember loving a fresh notebook, new pens, and that feeling of starting fresh. This year, that “fresh start” energy had me looking at the little things in my home — even the jars in my pantry. One salsa jar in particular got a makeover into the perfect, aesthetic storage for odds and ends: chalk, pens, washi tape, even cinnamon sticks. It’s the kind of thing that makes you feel put together without spending a dime.
Upcycled jars aren’t just great for keeping your home organized — they make thoughtful, budget-friendly gifts too. If you save them throughout the year, you can easily put together a charming little gift box. Fill each jar with something useful or special, like chalk for a teacher, tea for a friend, or office supplies for a coworker. Arrange them in a simple wood box or basket, add a tag, and you’ve got a personalized gift that’s practical, pretty, and eco-friendly.
I even put together a few ideas I think would make adorable teacher gifts. You could pair your upcycled jars with things like:
📚 Library Card Coasters for the book-loving teacher
🍵 Novel Teas — 25 teabags with literary quotes for cozy afternoons
📖 Personal Library Kit with Due Date Cards & Rubber Stamp for keeping the classroom organized
- 🕯️ Scented Candle — a cozy, calming gift
Simple, personal, and easy to put together — all while giving your jars a new life.
My original upcycle jar idea came from potluck recipe I whipped up that became a house favorite. Sometimes a good recipe just begs for a remix.
I spotted a jar of green Cholula salsa at the store and thought, why not try the same easy method with shrimp? Same simple steps, totally different vibe — light, fresh, and perfect for summer.
This variation came together in under 30 minutes and was a hit at home. Here’s how I made them!

What You’ll Need
- 1 bag medium frozen shrimp (peeled, deveined, tail off)
- 1 jar green Cholula salsa
- Olive oil
- 1 large onion (sliced)
- Salt & pepper to taste
- Monterey Jack cheese (block)
- Sharp cheddar cheese (block)
- King-size corn tortillas
- Green enchilada sauce (any brand you like)
Step 1: Boil Your Shrimp
Bring a pot of salted water to a boil. Add the frozen shrimp and cook for about 10 minutes, or until the shrimp turn pink and are cooked through. Drain and set the shrimp aside.
Step 2: Build the Flavor
Heat a large pan (I use a cast iron skillet) and add a bit of olive oil. Once hot, add a few large slices of onion for flavor, then add the cooked shrimp.Season with salt and pepper and let the shrimp cook until they develop a little color.
Next, pour in the entire jar of green Cholula salsa and let it simmer until most of the liquid from the salsa is absorbed. Remove from the heat and set aside.
Step 3: Shred the Cheese (Yes, Fresh Matters!)
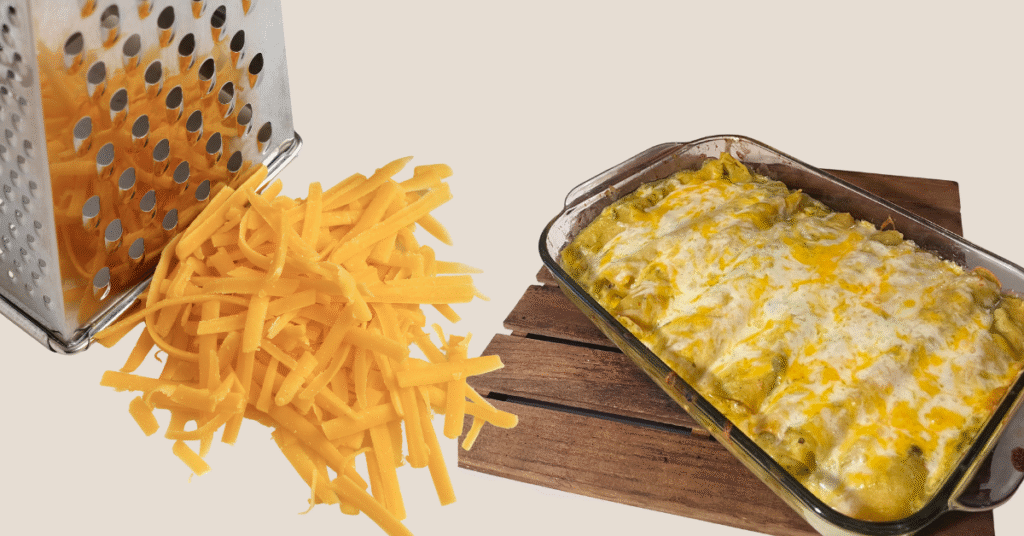
Okay, I know this is the Lazy Girl recipe, but do not use pre-shredded cheese. Trust me on this one—it’s worth the extra 5 minutes.Use a mix of Monterey Jack and sharp cheddar (yes, the “sharp” part matters). Grate a good amount of each—we are going to use it inside the enchiladas and to sprinkle on top.
Step 4: Fry the Tortillas
In a hot pan with olive oil, lightly fry each tortilla on both sides—about 30 seconds per side. Then transfer to a tray lined with paper towels to absorb the excess oil. The tortilla will bubble a little then you know its ready. Once all tortillas are fried, gently blot off remaining oil. They’re ready to dip in sauce.
Step 5: Dip + Roll
Dip each tortilla in green enchilada sauce—just enough to cover the tortilla but do not drench it or it will fall apart.
Add some of your shrimp + salsa filling then some of your shredded cheese mix and roll and place in a glass tray. Continue until you fill the tray.
Spoon on some additional green enchilada sauce then sprinkle on more cheese. I love cheese so I make sure it’s completely covered. Now you can keep them in the refrigerator like this until you’re ready to serve.
Step 6: Bake or Serve
When ready to serve, pop the tray in a preheated oven at 400°F for 10 min to heat through and melt the cheese. Serve with your favorite Mexican side dishes.

Whether you’re organizing your space or gifting a thoughtful package, those upcycled jars are a simple way to add charm and function to everyday life. And when dinner time rolls around, you’ll have a quick, delicious recipe ready to go — like these Lazy Girl Enchiladas (or the shrimp variation) that inspired the whole upcycle.
Here’s to making the most of what you have — one jar (and one meal) at a time!


